Every time you move wine from one container to another — a process called racking — you’re playing a quiet game of chicken with oxygen. Racking is simply the act of transferring wine off its sediment (the layer of spent yeast and grape solids that settles at the bottom of your fermentation vessel) into a clean vessel, usually a glass or plastic carboy. Done right, it clarifies your wine and removes compounds that can create off-flavors. Done carelessly, it splashes air into the liquid, triggering oxidation — a chemical cascade that turns a fresh, fruit-forward wine flat, brown, and stale. The tools you use to move the wine matter far more than most new winemakers expect. This guide breaks down exactly which transfer tools are worth your money at each stage of the craft, and why the difference between a $12 auto-siphon and a $60 CO₂-purged racking system isn’t just convenience — it’s the difference between a wine that’s alive and one that quietly died during a three-minute transfer.
| EDITOR'S PICKBrewing & Fermentation Heat Pad… | Mid-tierFermtech Mini 14" Long Deluxe S… | Budget pick[Fermtech - Auto Siphon Mini wit…](https://www.amazon.com/dp/B00SDLLZDY?tag=greenflower20-20) | |
|---|---|---|---|
| Siphon Length | — | 14" | — |
| Tubing Length | — | — | 6 ft |
| Includes Hose Clamp | — | — | ✓ |
| Temperature Control | ✓ | — | — |
| Siphon Type | — | Auto | Auto |
| Price | $59.95 | $24.99 | $15.99 |
| See on Amazon → | See on Amazon → | See on Amazon → |
Why Oxygen Is the Enemy at Racking Time (and the Chemistry Behind It)
Before we get to the gear, it helps to understand what you’re actually protecting against — because the tradeoffs between transfer tools only make sense once you know what each design is trying to prevent.
When wine contacts air, dissolved oxygen reacts with ethanol and phenolic compounds in a chain reaction that produces acetaldehyde (a sharp, bruised-apple smell) and, over time, breaks down color and aromatic compounds irreversibly. UC Davis’s Department of Viticulture and Enology notes in their oxidation chemistry overview that red wines have more natural antioxidant capacity from tannins and anthocyanins, but white and rosé wines are acutely vulnerable at every transfer point. The MoreWine! Winemaking Guide on racking and sulfite additions is explicit: the single most important moment to minimize oxygen pickup is during racking, because the wine is fully exposed — no active fermentation producing CO₂ as a natural blanket, no lees layer acting as a buffer.
The second variable is headspace — the empty air gap between the surface of your wine and the top of the vessel. Every millimeter of headspace is a reservoir of oxygen sitting in contact with your wine. After racking, you want that gap as small as possible, which means your transfer tool needs to move wine cleanly, completely, and without excessive foaming or splashing that introduces additional air.
The three oxygen-exposure moments during racking:
- Suction initiation — starting the flow often involves mouth-siphoning or pump priming, both of which introduce turbulence and air
- Transfer flow — splashing or free-fall into the receiving vessel
- Line clearing — the last push of liquid, often the most turbulent
A well-designed tool minimizes all three.
The Tool Lineup: What Each Option Actually Does
Basic Racking Cane (No Auto-Prime)
The traditional racking cane is a rigid plastic or stainless tube, usually 24–30 inches long, with a tip fitting that sits just above the sediment. You attach it to vinyl tubing, drop it into your carboy, and start the siphon by mouth or by filling the line with water.
This works. Winemakers have used it for generations. But the mouth-siphon method introduces saliva — and the bacteria it carries — directly into wine you’ve spent months protecting. Penn State Extension’s home winemaking sanitation guide specifically calls out mouth-siphoning as a contamination vector that’s easy to eliminate with a one-piece auto-siphon. The other problem: starting the siphon almost always involves a period of turbulent, splashing flow before you get the tube end positioned correctly in the receiving vessel.
At roughly $3–8 for a basic cane, this is the entry point — and frankly, the one you should graduate out of as soon as your batch size and investment justify it.
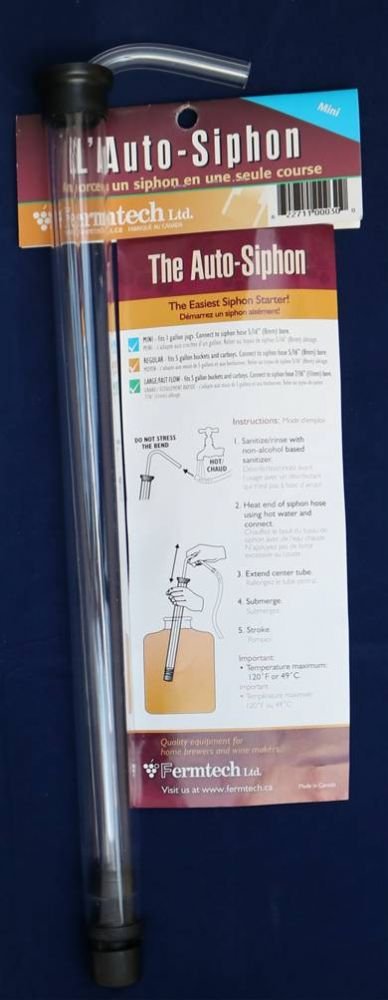
Auto-Siphon (Pump-Prime Style)
The auto-siphon — a spring-loaded outer sleeve over an inner racking cane — is the most common upgrade and, for most intermediate winemakers, the right core tool. A single pump stroke displaces air from the line and starts clean liquid flow without mouth contact. The foot piece (a small cap with inlet holes on the bottom of the inner tube) keeps the intake just above the sediment bed, reducing how much lees you pull over.
| Tool | Approx. Cost | Batch Size Fit | Oxygen Risk Level |
|---|---|---|---|
| Basic racking cane | $3–8 | Any | High (mouth-prime) |
| Auto-siphon (5/16” tubing) | $10–15 | 1–3 gallon carboys | Low-moderate |
| Auto-siphon (1/2” tubing) | $12–18 | 5–6 gallon carboys | Low-moderate |
| Stainless auto-siphon | $25–40 | 5–15 gallon | Low |
| CO₂-purged racking wand / closed transfer kit | $45–120 | 5–30 gallon | Very low |
BSG Handcraft’s product documentation for their auto-siphon line notes that the 1/2” diameter model moves roughly twice the volume per stroke compared to the 5/16” version, which matters when you’re working a 6-gallon carboy and want the transfer done before significant air exchange occurs. Owners across aggregated reviews consistently flag the sediment foot as the detail that separates a good auto-siphon from a mediocre one — a loose-fitting or missing foot piece lets you vacuum up the entire lees bed in the final two inches of transfer.
What to look for in an auto-siphon:
- Snug sleeve fit (no air bypass around the piston)
- A solid sediment foot that clips securely
- Available in the diameter that matches your tubing and carboy size
- Easy disassembly for cleaning — the sleeve and inner cane should separate fully
Stainless Steel Auto-Siphon
For winemakers working in the $500–$2,000 equipment tier — Speidel tanks, Marchisio vessels, multi-vintage cellars — a stainless steel racking assembly isn’t an indulgence, it’s a maintenance decision. Plastic auto-siphons develop micro-scratches over 15–20 rackings, and those scratches harbor tartrate deposits and potentially lacto bacteria in a way that’s nearly impossible to sanitize out completely.
The stainless versions (typically 304 food-grade stainless) can be boiled, run through a sanitizer cycle without the degradation concerns that plague plastic, and will outlast a decade of seasonal rackings without clouding or cracking. Owners at the prosumer level consistently report that switching to stainless eliminates the anxiety of “is this cane actually clean” that creeps in around Year 2 with plastic gear.
Closed Transfer / CO₂-Purged Racking
This is where intermediate practice starts to separate from advanced. A closed transfer means the wine never contacts open air at any point during the move — the source vessel is sealed, the receiving vessel is pre-purged with CO₂ (carbon dioxide gas, which is heavier than air and displaces oxygen), and the wine travels through a sealed line from inlet to outlet.
WineMaker Magazine’s analysis of dissolved oxygen management at racking puts the pickup from a well-executed open auto-siphon transfer at roughly 1–3 mg/L of dissolved oxygen per racking. A closed CO₂-purged transfer can reduce that to under 0.5 mg/L. For a wine that will see 3–4 rackings over 12 months of élevage (the French term for the aging and maturation period after primary fermentation), that difference compounds significantly.
The practical kit for a home winemaker interested in closed transfers: a small CO₂ cylinder or cartridge system, a dual-valve racking bung (a rubber stopper with two ports — one for the siphon tube, one for a CO₂ inlet), and a receiving vessel with a similar two-port bung setup. MoreWine!‘s winemaking guide on racking and sulfite additions covers the CO₂ purge protocol in detail — the basic sequence is to flood the receiving carboy with CO₂ for 20–30 seconds before the transfer begins, then rack wine in at a downward angle against the vessel wall to prevent splashing.
SO₂ and Racking: The Chemistry You Can’t Skip
No discussion of transfer tools is complete without sulfite management, because the two are inseparable in practice. Free SO₂ (sulfur dioxide, the active antimicrobial and antioxidant fraction of a potassium metabisulfite addition) is consumed during racking — some is driven off by the turbulence, some reacts with the trace oxygen you’ve just introduced.
MoreWine!‘s racking guide recommends checking free SO₂ before every racking and making a corrective addition to the receiving vessel before the wine arrives — typically targeting 25–35 ppm molecular SO₂ for a wine at normal cellar pH. This is not optional if you care about the wine’s trajectory over the next 60–90 days. Your racking tool choice and your SO₂ protocol are a system, not two separate decisions.
The Decision Rules: If X, Then Y
This is where the research pays off in a concrete decision frame. Here’s how to match your tool to your actual situation in 2026:
If you’re on your first or second batch with a basic wine kit: A quality auto-siphon with the correct diameter for your 5–6 gallon carboy is your whole upgrade. Spend the $12–18, add a sediment foot if yours didn’t come with one, and stop mouth-priming immediately. That’s the single highest-return change you can make.
If you have 3–6 batches under your belt and you’re starting to care about wine chemistry: Add a dual-valve racking bung and a small CO₂ cartridge system to your next order. Start doing CO₂ purges on your receiving vessel. At this stage you’re probably also checking pH and free SO₂, and your racking losses to oxidation are the next thing to tighten.
If you’re working with 10+ gallon batches, dedicated cellar space, or equipment north of $500: The stainless auto-siphon or a proper racking pump (a hand-operated or electric peristaltic pump designed for wine transfer) is worth evaluating. The time savings on a 15-gallon Speidel transfer alone justify it, and the sanitation longevity of stainless at volume is materially better than plastic.
If you’re doing 3+ varietals per vintage with multiple racking cycles: A full closed-transfer setup with CO₂ bottle and racking bungs is the professional-level move. The dissolved oxygen savings over a full vintage’s worth of racking events are real, measurable, and reflected in your wine’s longevity on the shelf.
The math is simple: racking is not a neutral event. Every transfer costs you some SO₂, introduces some oxygen, and risks some sediment disturbance. The right tool doesn’t eliminate that cost — it minimizes it to the point where the benefit of moving the wine off its lees outweighs the oxidative risk of the move itself. That’s the whole game.
A Note on Tubing and Connections
The racking cane or auto-siphon body is only as good as the tubing you attach to it. Standard food-grade vinyl tubing works, but it’s worth knowing that vinyl is oxygen-permeable over long contact periods — meaning wine sitting in a full line for extended time can pick up oxygen through the tube wall. For a quick racking event this is negligible. For winemakers experimenting with wine transfers that sit under pressure or in-line for extended periods, silicone tubing (which is more gas-impermeable and easier to sanitize) is the better long-term choice. BSG Handcraft’s product documentation for racking accessories lists both vinyl and silicone options sized to match their cane fittings.
Clean your tubing after every single use. Wine residue inside vinyl tubing becomes a biofilm problem within 48 hours at cellar temperatures. No racking tool survives bad sanitation habits.